

In this post I will give a step by step process to setup cloudflare on your website.
Step 1: Setup your DNS
Setup your DNS on your domain name provider you can follow the following guide for this Setup DNS. Skip this step if you have already configured a custom domain for your website.
Step 2: Create a Cloudflare account
To sign up for Cloudflare click on Sign Up after you do, you will see the following UI on the homepage, here you need to enter your domain name and then click on “Add a Site”.

Step 3: Setup Cloudflare
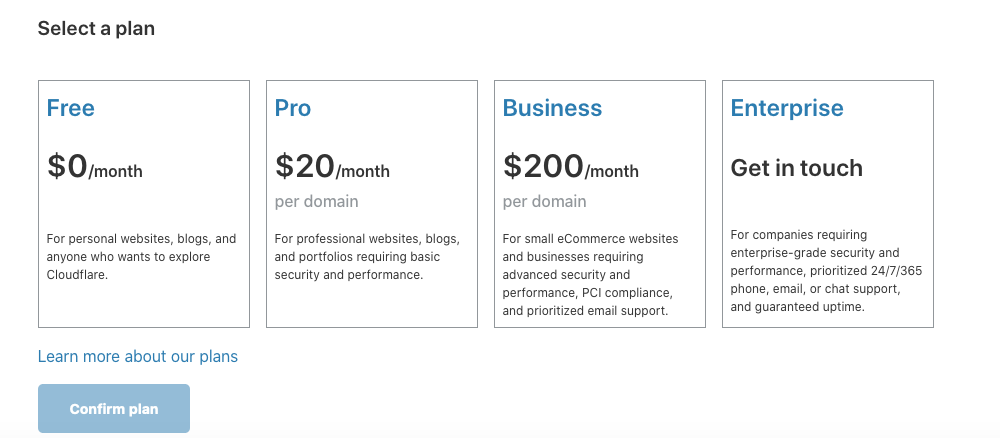
Once you click on “Add a Site”, you will get a screen similar to the one above. Select a plan in this screen and proceed, please note that the SSL certificate is included in all the plans starting from the one with 0$.
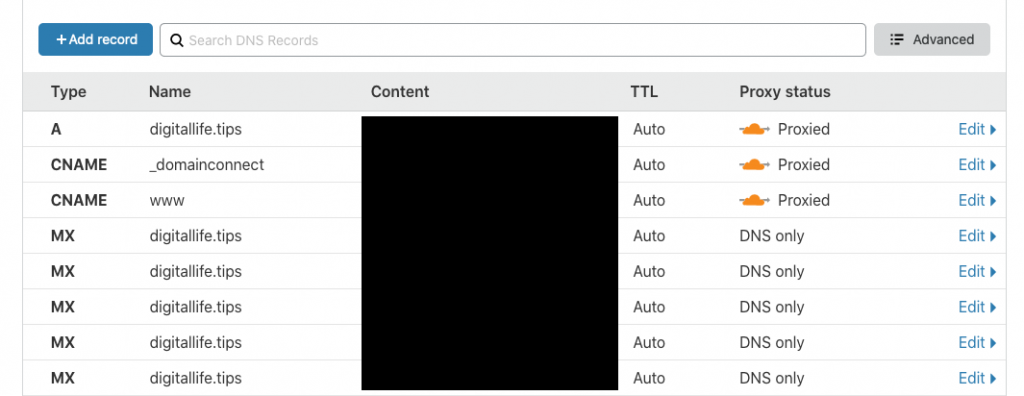
After you choose a plan Cloudflare will automatically detect the DNS settings that you confirmed in Step 1. You will see a screen similar to what is shown below make sure the “Proxy status” is showing as orange cloud icon for the “A” and “CNAME” records.
Step 4: SSL Settings

Click on the SSL/TLS button from the top panel which will get you to a screen similar to:
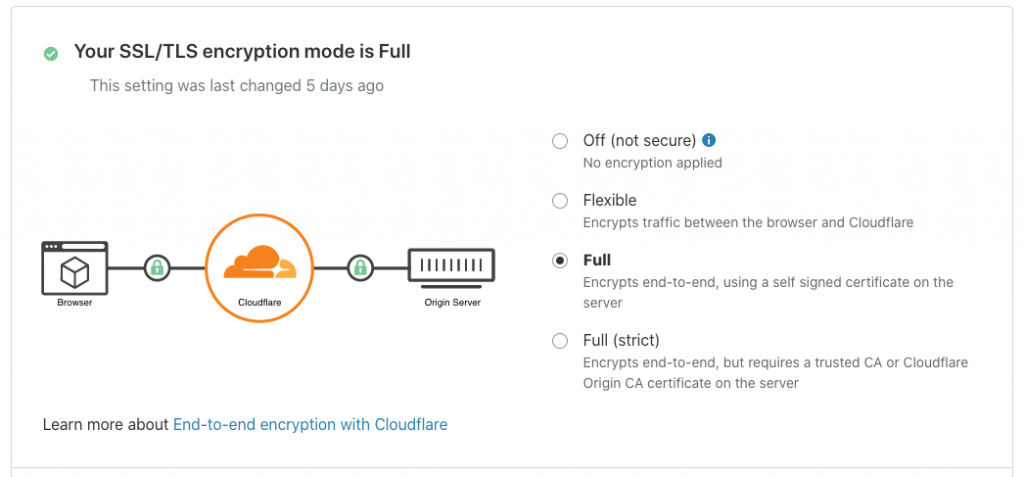
In this screen you need to make a choice.
- If your hosting provider does not provide a default certificate you need to choose “Flexible”, this option tells Cloudflare to encrypt the traffic only between users and Cloudflare’s server, with respect to security this is a fairly secure option.
- If your hosting provider provides a default certificate then choose “Full” option. This option makes your traffic fully secure but it is still not end-to-end encrypted. This is more secure than the previous option, when you choose this option Cloudflare achieves the encryption using a combination of Cloudflare origin certificate on the users end and a self-signed certificate on the hosting server end.
- You can go for the full (strict) option if your hosting plan allows you to install certificates on the server. In this case end-end encryption is achieved using a certificate issued by a trusted signing authority, you can also request a certificate from Cloudflare.
Your configuration is complete here if you have chosen “Flexible” or “Full”. Continue over to next section for “Full (strict)” option.
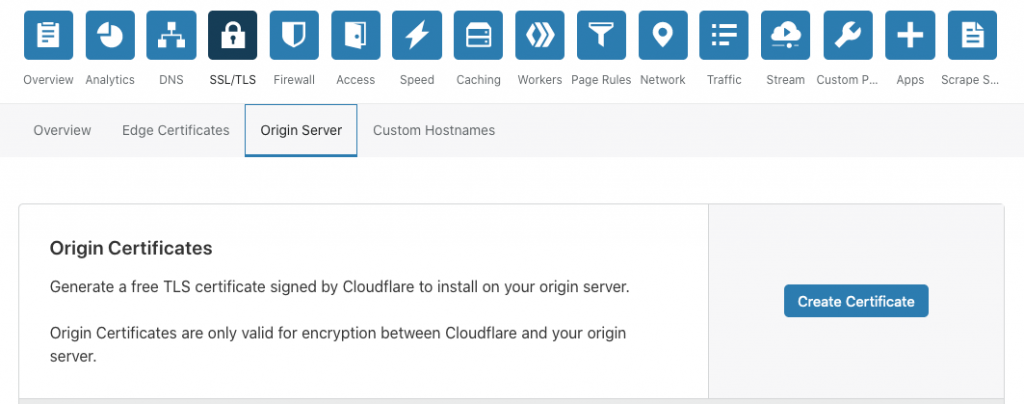
Setting Up Cloudflare Origin Certificate
If you want to setup an end-end encrypted connection then you can proceed to “Origin Server” tab. Click on “Create Certificate”.
Copy your certificate and private key. Do not forget to copy your private key, if you miss this then due to security reasons you will not be able to retrieve your private key from portal again.
To install the certificate on your server follow your hosting provider’s instructions. Your setup is ready.
Comments